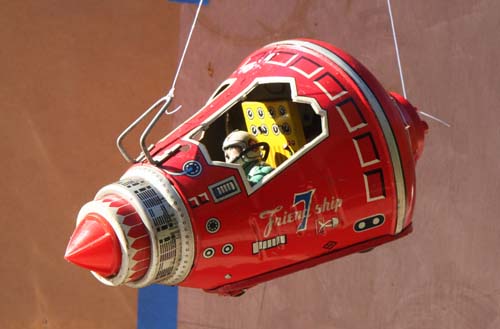
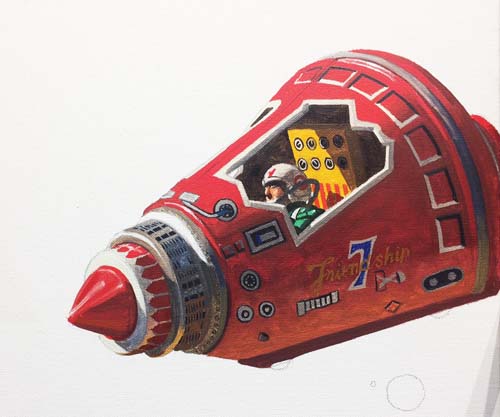
This painting idea started with this tin
toy space capsule, made in Japan in the 1950's. The interior of
the capsule has the astronaut in a rotating seat, giving him the
best possible view out his two windows.
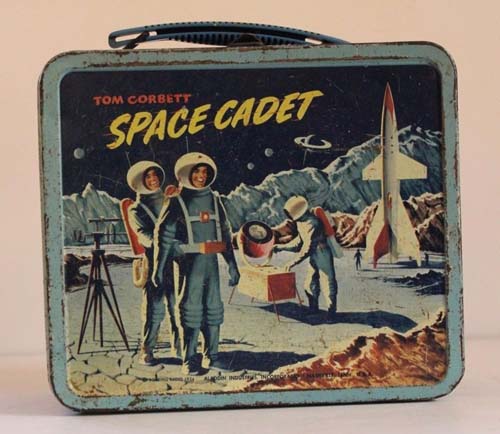
After purchasing the space
capsule, I looked at a number of period art pieces and really
thought this Space Cadet lunch box was very cool. I'd use some
of this imagery to help me develop my painting.
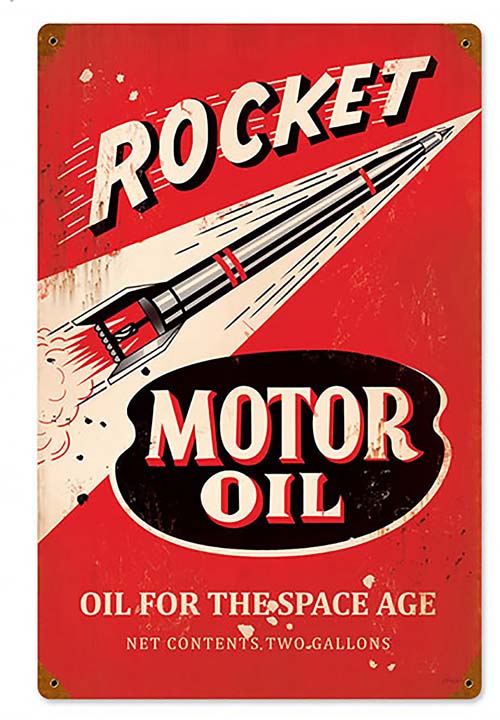
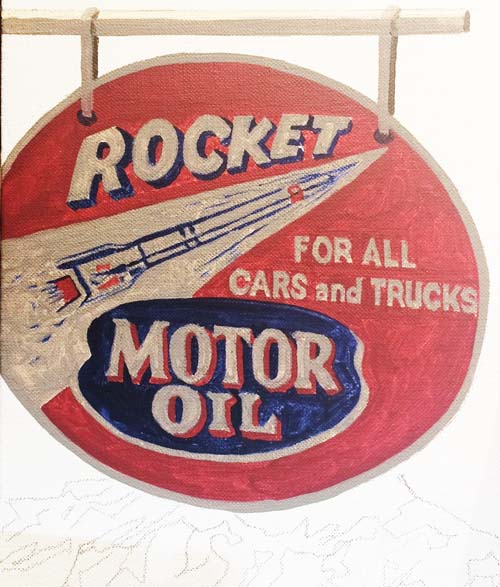
A third vintage object was this motor oil
company sign. The 'Rocket' Motor Oil was perfect for my growing
idea.

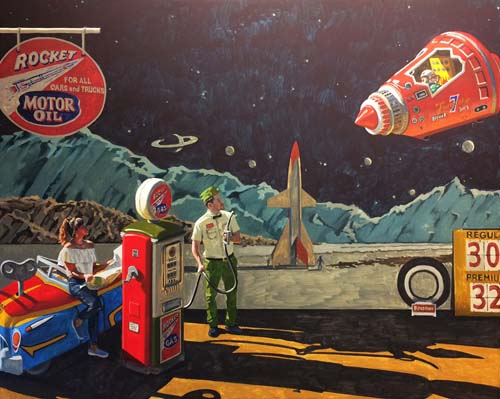
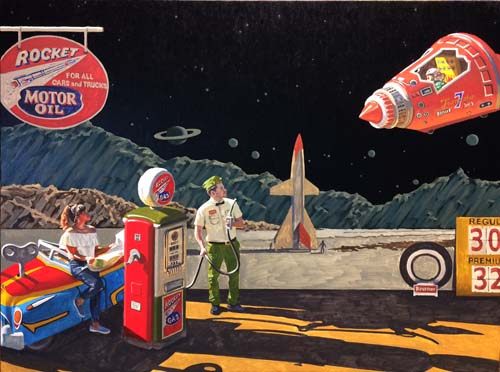
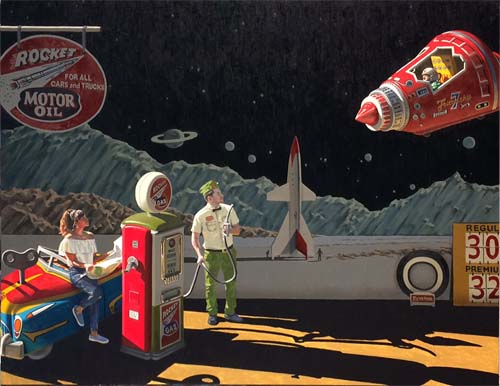
Here's the idea I came up with. A gas station
attendant is getting ready to pump some fuel into a toy car that
has a toy person aboard, when a random space capsule floats into
the station. The background is made from bits and pieces of the
lunch box and is painted on a wall behind the attendant.
Change of plans!!!
Just after completing the design of
this painting, I was approached by a friend and soon to be
collector, asking me what I had for sale. He was looking for a
surprise Christmas present for his special partner. She just
happened to be a long time fan and follower of my work. Well, he
really liked this outer space theme and when he wanted to
commission me to do it, it was only natural to not only have him
pose in the painting, but to also have his young lady take the
place of my comical toy man who was in the car. I would have her
standing outside the car, reading a road map. Also, with two
people in the painting, I've decided to name this image,
"Spaced Cadets."
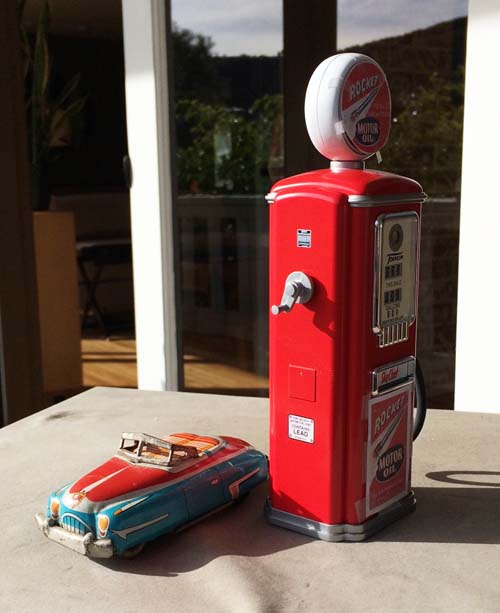
I purchased a replica gas pump for the
painting and decided on this tin car to replace the other car.
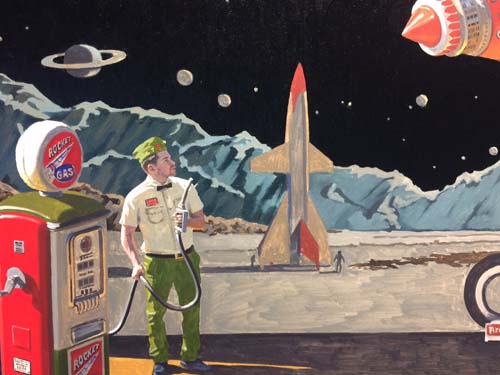
I've started on the canvas, rendering the
space capsule first. I love the way the astronaut appears to be
eyeballing his landing area at the gas pump.
The Rocket Motor Oil sign hangs above the
pump, connected off canvas to the gas station building.
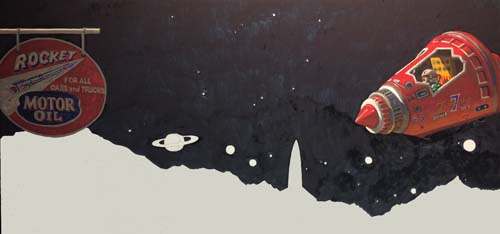
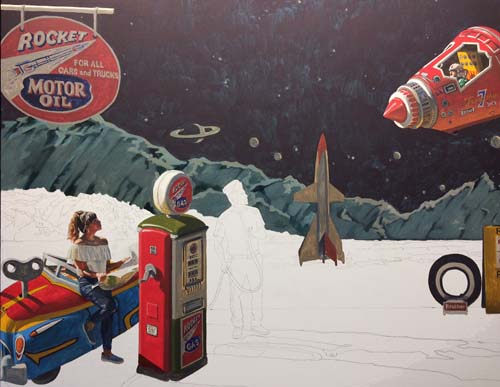
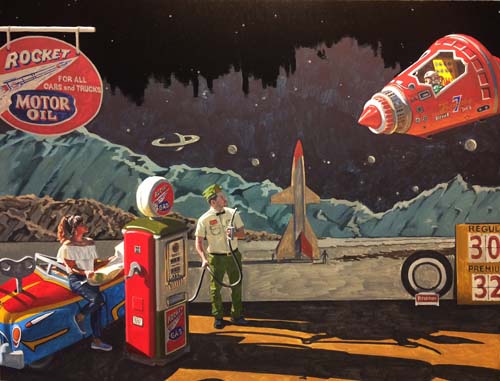
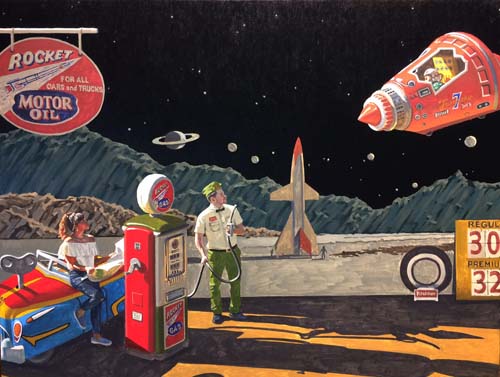
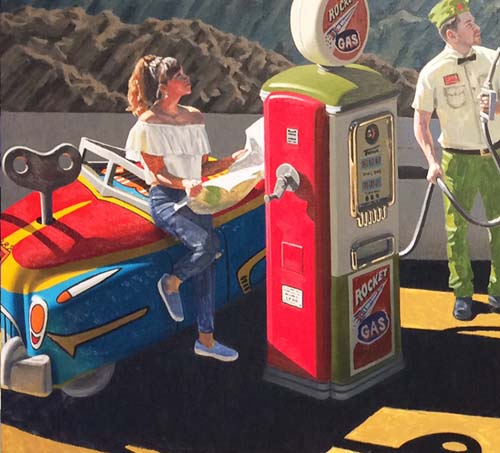
Here is a look at the entire width of the canvas, with the
background outer space blocked in.
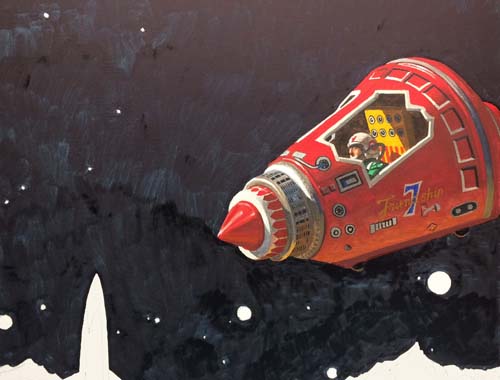
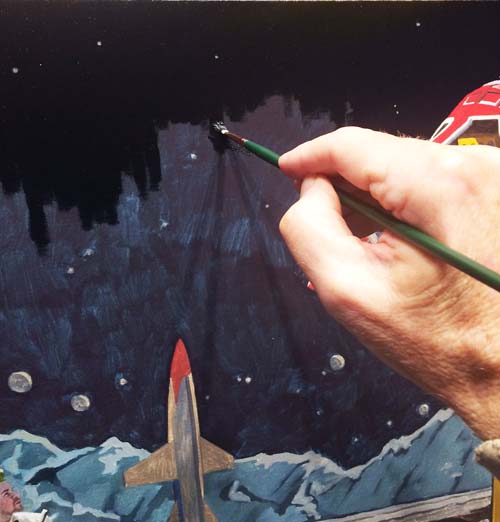
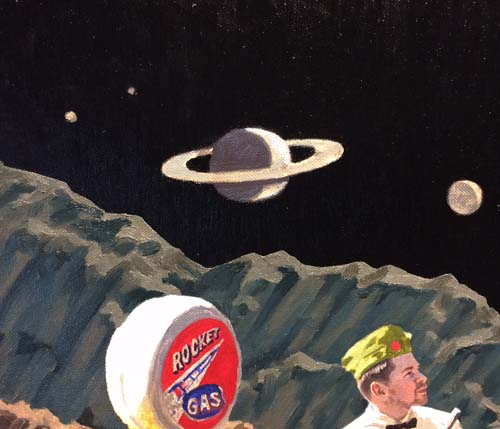
This close-up gives you an idea how dramatic the space capsule
looks against the dark sky.
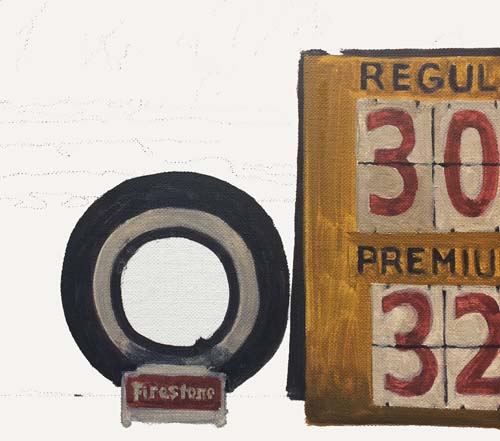
The tire stand and the price stand are old standards for gas
stations in the 50's. Some are still being utilized. I paid $.25
a gallon when I first started driving in 1965.
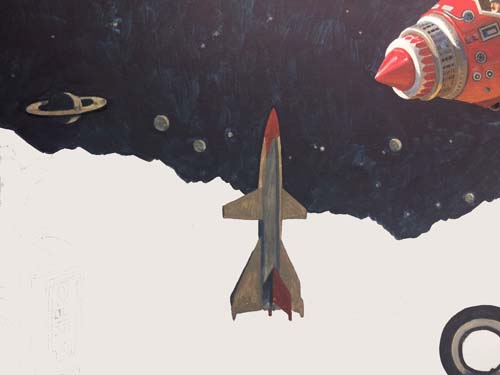
This photo shows the beginning of the background with the rocket
ship and the planets.
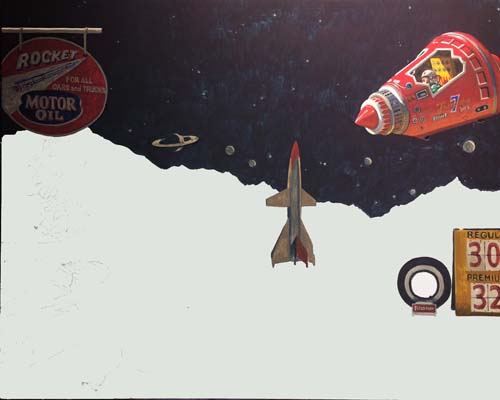
Here's an overall look at the entire canvas.

The gas pump is very cool. I've added a green color to part of
the case, and changed it to Rocket Gas. At this point, I can't
continue with the painting until I have my models drawn in. We
have their photo session tomorrow and I should get them on the
canvas this week.
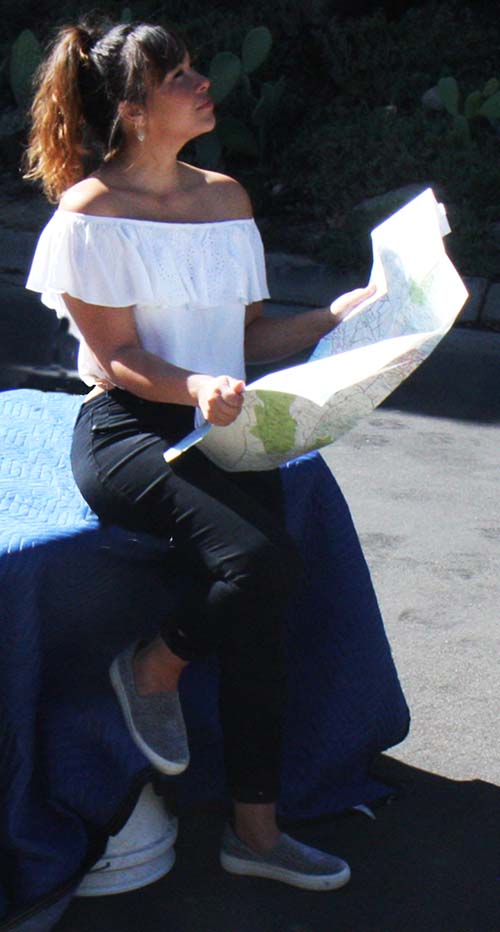
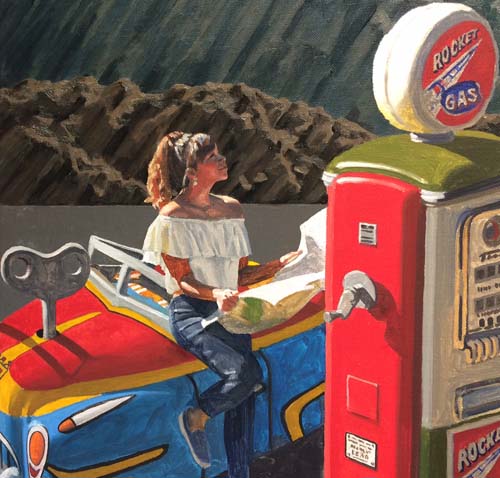
Today was our photoshoot. The weather was perfect and so were
the models! The young lady driver posed holding an old school
map. Notice the upside down bucket under the table...it gave her
something to rest her foot on since we didn't have a large
enough toy car!
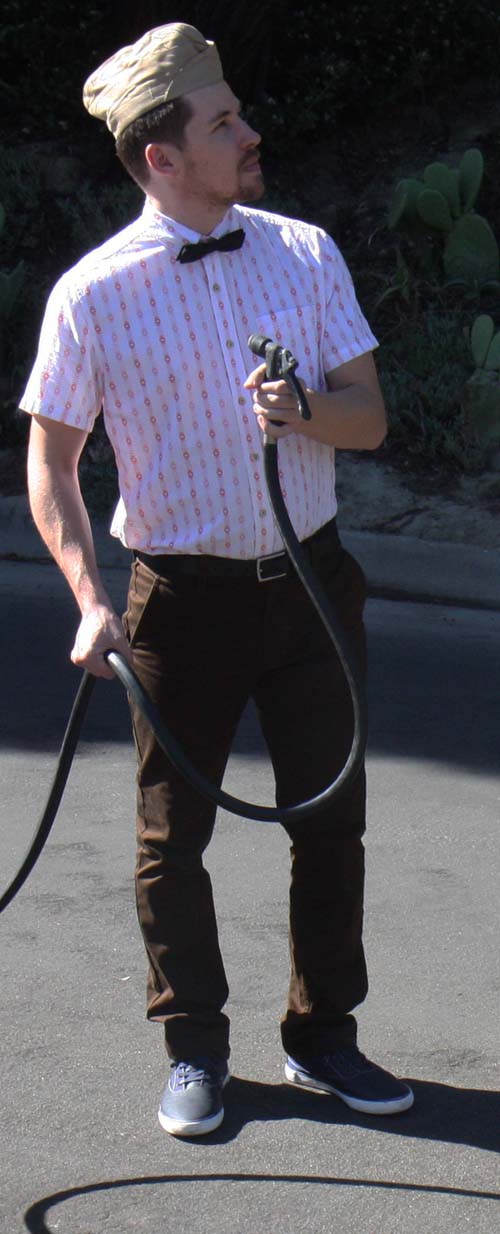
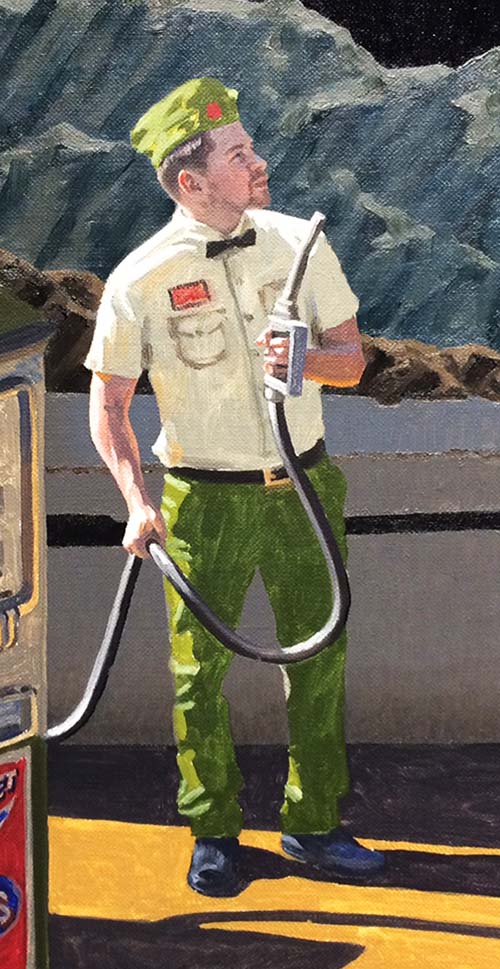
The young gentleman gas station attendant made pretend with my
garden hose. The crisp sunlight today really showed off the
highlights. Take note of his gas station hat. That's one of my
Marine Corps covers (hats) from 1970.
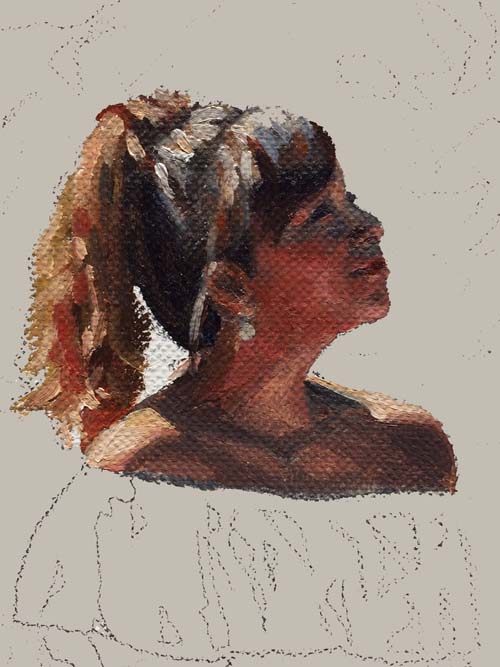
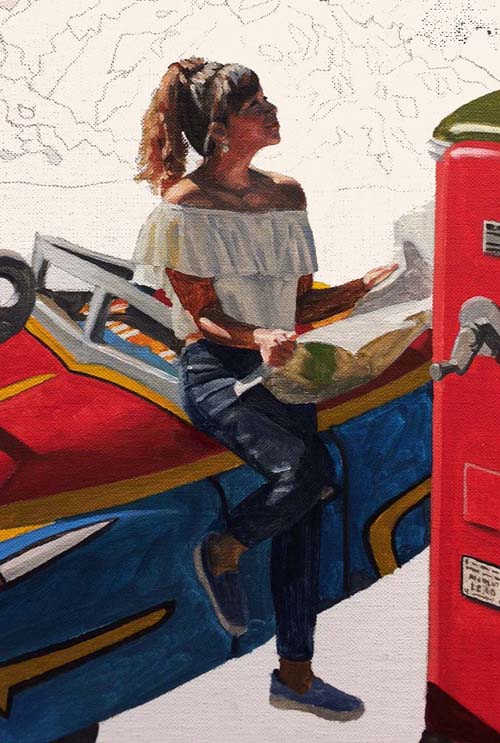
I decided to start with the young woman in the painting,
sculpting her upper torso with a wide range of warm and cool
hues. The map she is holding will be casting a bright glow back
on her.
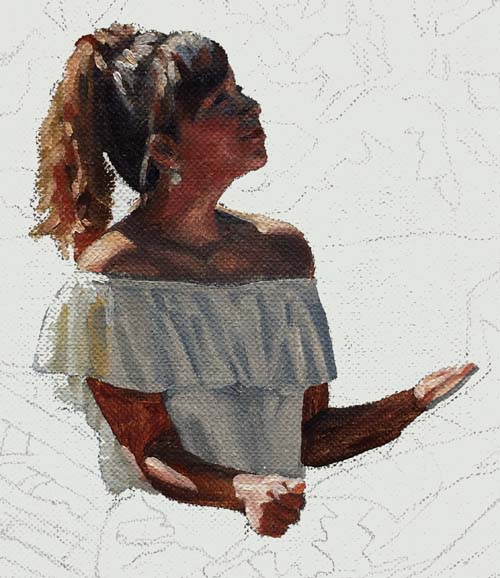
I've moved down the figure to both arms and her blouse. As
with all people in my paintings, I strive to capture the
lighting, with hopes that some of the likeness shows through. In
my technique, since I paint everything with two layers of paint,
I'll have a second chance to make any corrections that I feel
are necessary to enhance the image.
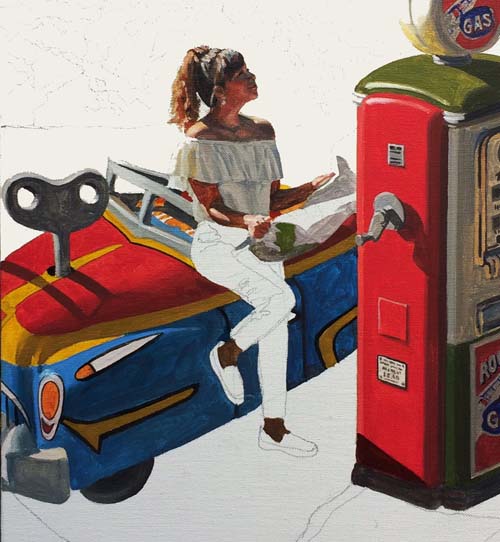
I wasn't sure what color to paint her pants, so I painted the
car, hoping that it would help me make a decision...
...and it did! I went with the original dark blue color.
I've begun the background mountains.
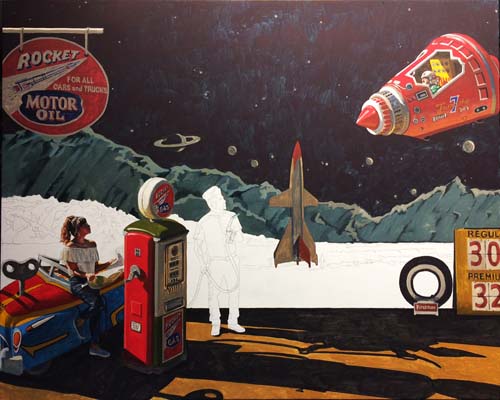
I developed the cast shadows today to help me determine how dark
to make the the background area that I hadn't finished. The gas
station attendant and the bottom of the background is all that
is left to get to the halfway point in the painting.
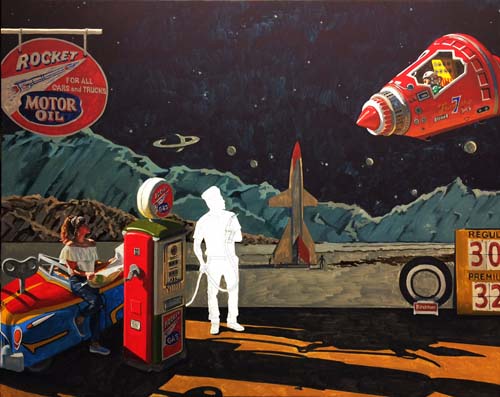
This photo shows the background completed, that is, the first
layer of paint finished. Although it looks fairly dark, I can
already tell that it will have to darken further in order to
make the light that lands on the foreground objects (the car,
woman, gas pump, attendant and space capsule) appear much
brighter.
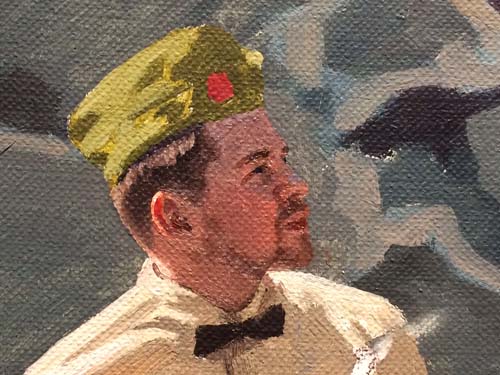
The gas station man is beginning to take shape. As I mentioned
with the woman model, painting a portrait when the head is less
than an inch in height is very difficult to achieve. Every flick
of the brush can change the features of a face at this scale.
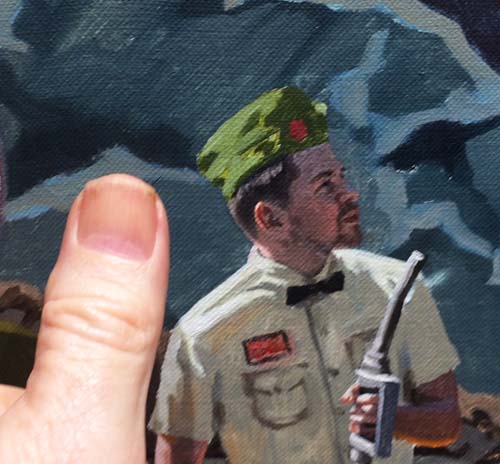
I've put my thumb next to the man's head to give an idea of the
scale.
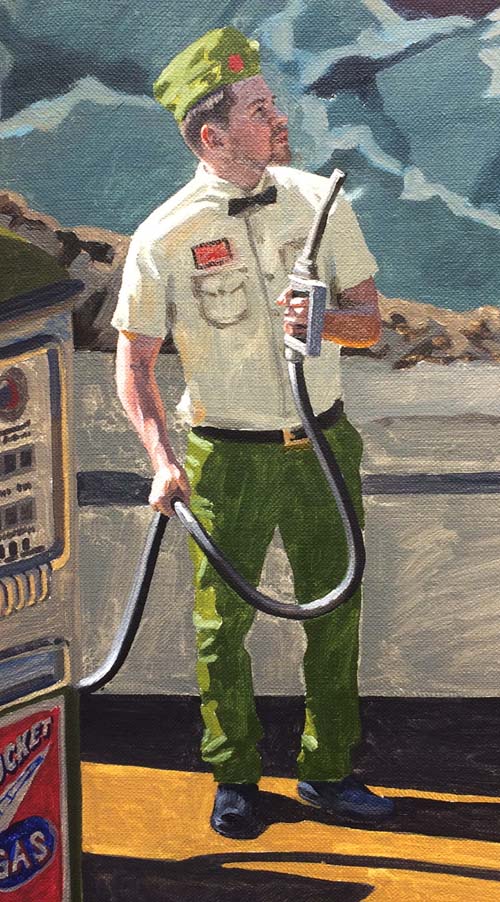
Here's a look at the attendant, head to toe.
With the man painted, this covers every inch of the canvas with
one coat of turpentine-thinned oil pigment. The basic image is
in place and it's now time to look at the overall lighting and
color, and make some decisions for the second and final layer of
paint. I call this the half-way point.
This photo shows me putting the final layer of paint in the sky.
I've chosen to paint the sky first in this final phase because
its dark value will dictate the values of the entire background.
I've mixed Thalo blue with burnt umber to make the color for
outer space. I'll paint around all the stars and planets and go
back later to give them their light and shadows.
You can see just how much of a game changer this passage of
paint is. Look at the difference in value between the first thin
layer of paint and this final heavier layer. The final layer is
straight out of the tube without any thinners or additives.
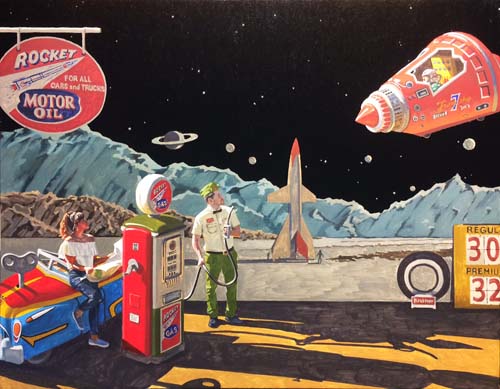
The sky is completely painted. It makes the rest of the painting
look pale in comparison, which is a good thing. It tells me that
not only do I need to darken everything in the painting, but
that the drama of the lighting is going to be spectacular!
The next area that I need to increase the value is in the
mountains. If you look closely, you can see how I've begun on
the left side of the painting, darkening all the sloping areas
of the mountains. I've reached the middle of the canvas, just
short of the rocket ship.
This photo gives you an idea how much darker I am making the
mountains. Look how bright it makes the tops of the mountains,
the areas where the light is hitting. Also, remember that the
background is not real, so it has its own light source, coming
from the right, where the painting's light source is coming from
the left.
I've completed the mountain, both its shadows and highlights.
Now you can see that this change makes the planets and stars too
bright. They compete with the light that is hitting my figures
and objects in the foreground.
This detail photo shows how the planets are almost as bright as
the gas pump.
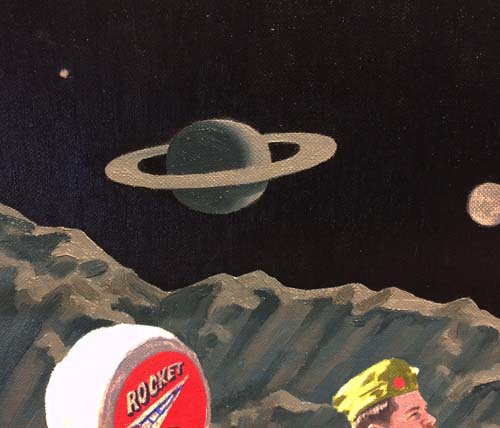
I've darkened Saturn to halt the competition it is having with
the light struck objects in the foreground.
With the mountain and all the stars and planets darkened, I can
now determine how dark to make the other background imagery.
The warmer, smaller rock formation in the background and the
ground is painted, showing how it has made the light really
shine on the foreground objects.
Here's another look at the way that the darkened background
makes the foreground 'pop'.
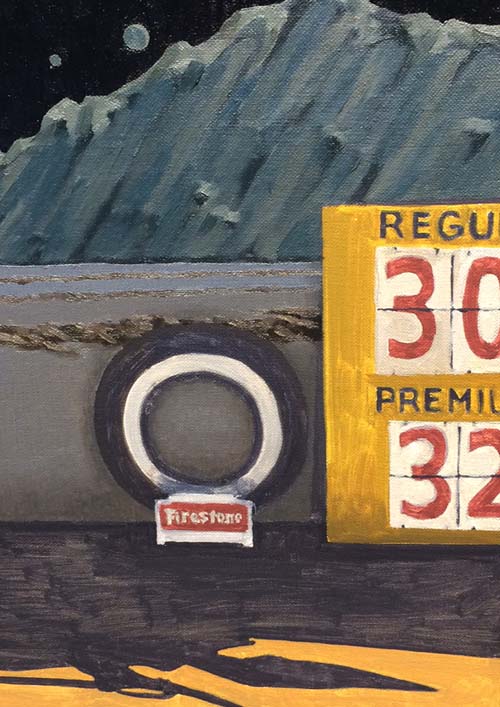
In order to help show that the background is a 2-dimentional
wall and not outer space, I've applied darker values behind the
tire and to the edge of the gas price sign. The tire and sign
will need some real substantial changes in their values (much
darker).
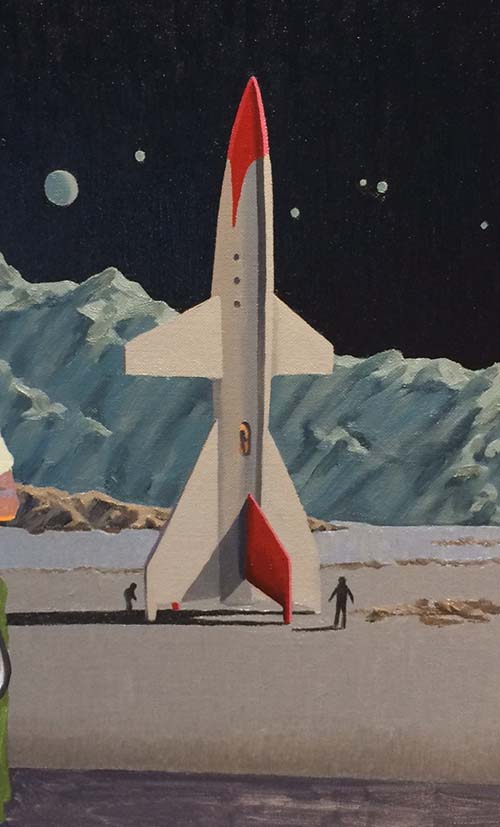
Here's a look at the rocketship in its completed state.
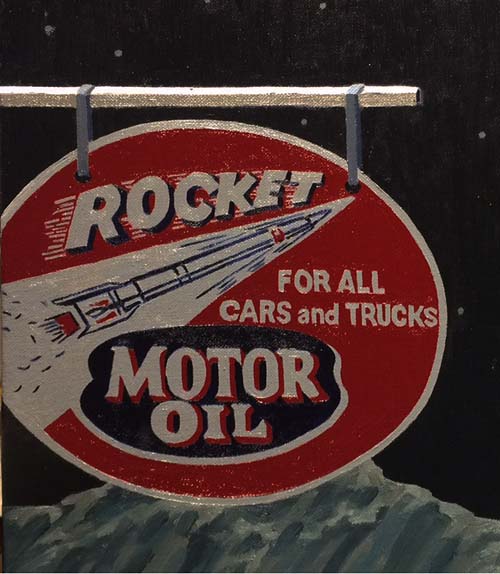
The Rocket Motor Oil sign is one of the objects that requires a
lot of time, making sure all the lettering is rendered properly.
I love the graphics on this old design.
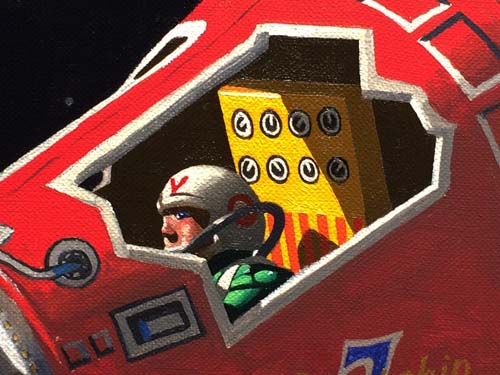
Moving on to the space capsule, I started by painting the inside
area of the window.
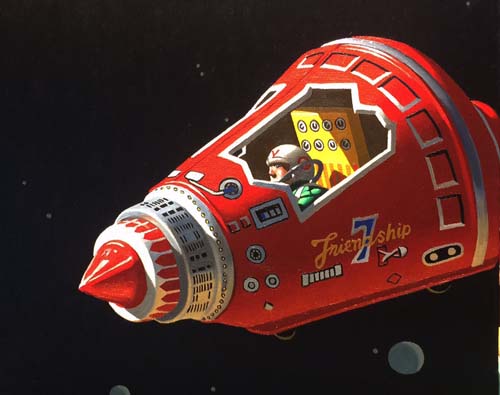
It's taken me over a week to render the space capsule, with all
its lithographed tin exterior. It's such a main ingredient of
the painting that it deserves a great deal of attention to its
detail.
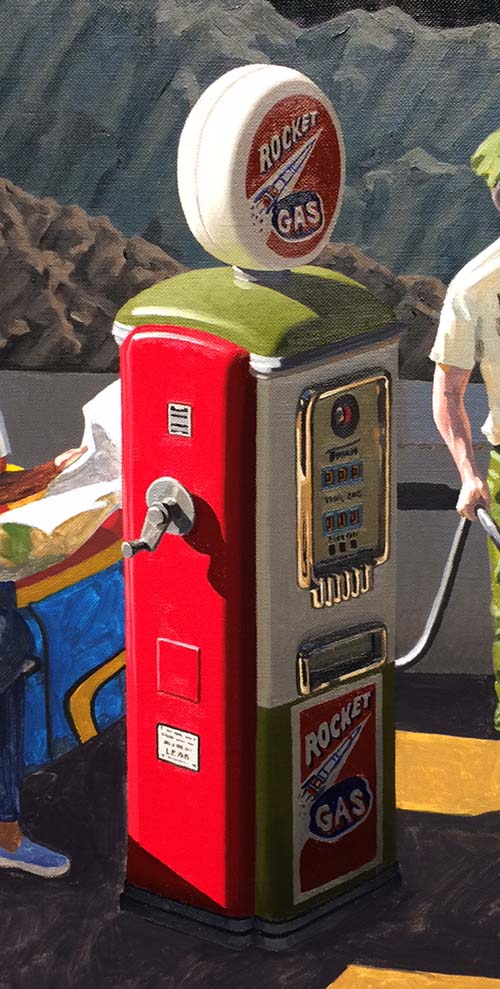
This photo shows the gas pump with its final layer of oil paint.
Its unique combination of red and green lends to the overall
balance of color in the painting. Look closely at the gas pump
dials and you can see that they are all on '0', meaning that the
attendant hasn't begun to pump any gas. The arrival of the space
capsule has halted a moment in time.
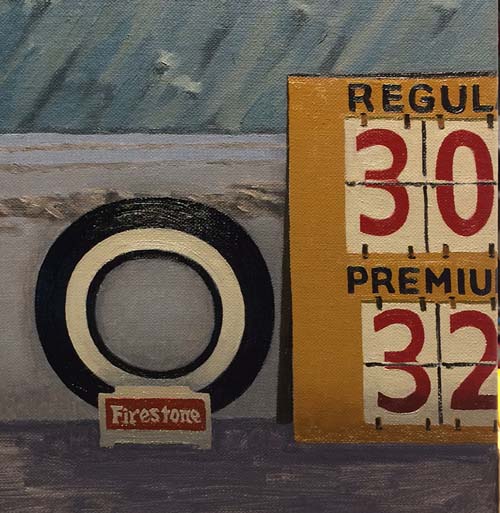
The tire and sign are finished. They will 'sit down' in the
painting much better when the ground beneath them is painted
much darker.
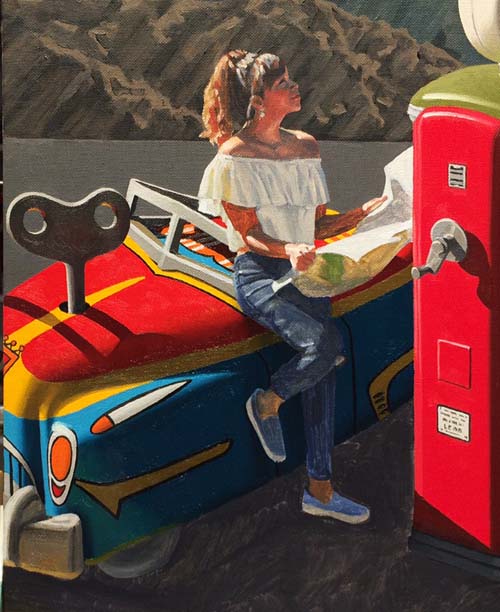
All the final hues and values have been increased on the car.
Their newer darker values start to make the woman's legs and
shoes start to glow.
And now, with the shadows being darkened to their final value,
her shoes look like they are floating in space. This tells me
that I will have to darken her feet so that they 'melt' into the
shadow of the car.
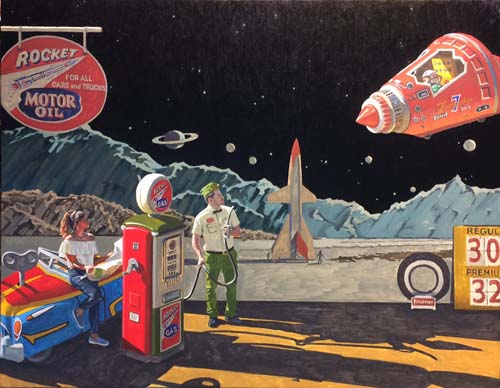
This photo of the complete canvas begins to show the final
dramatic lighting, as the cast shadows have been completed. The
light struck area of the ground and the final layer of paint on
the two figures will complete the painting.
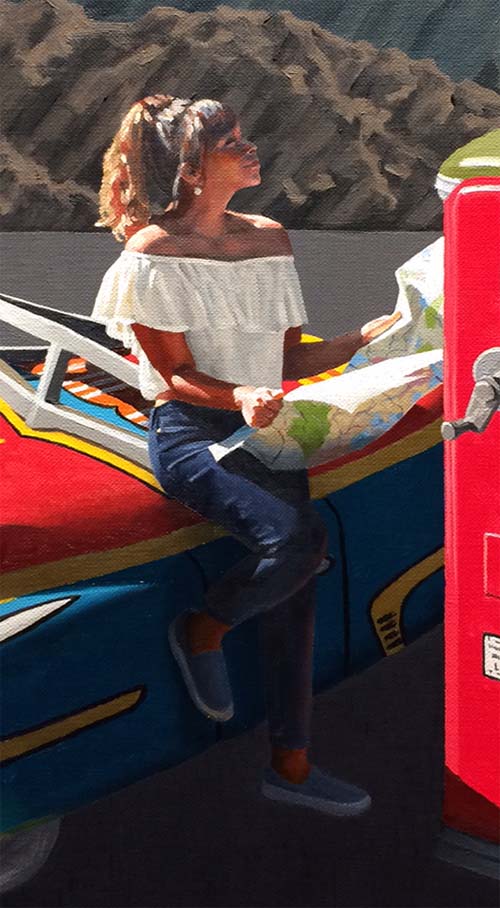
Over a week's work, detailing the woman and it turned out great!
See how her legs and feet blend into the shadow of the car.
Also, look at the detailing in the road map, with the light
shining through the paper. Very happy with the dramatic
lighting!
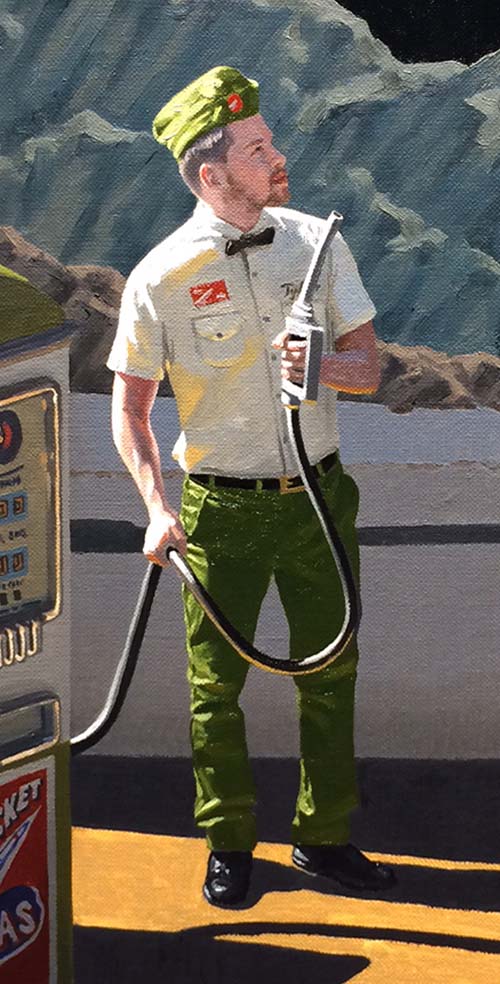
The gas station attendant is now finished. Notice the warm light
that shines through his shirt. Another layer on the light struck
areas of the ground and this painting will be complete.
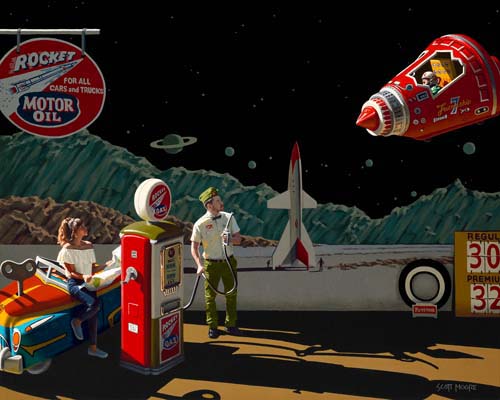
I'll get a better photo of
"Spaced Cadets" when it is completely dry and I
can coat it with a little varnish. For now, this studio photo
will have to do. It turned out great! Thanks for watching!
|