|
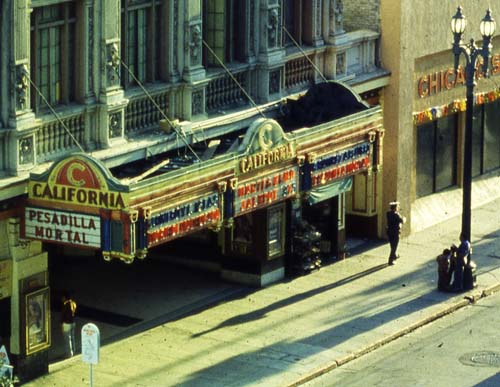
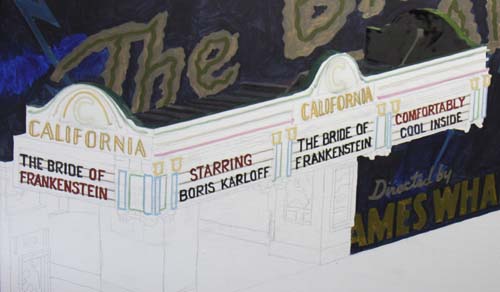
I took this photo of the California Theater from the fire escape
of an old building at 8th and Main Street in Los Angeles in
1982. I used the facade in a painting called "Magazine
Stand". When I came across this photo the other day, I
visualized this theater at night, with its neon all aglow. When
I was growing up in Bellflower, California, we would go to the
Saturday matinees at the Nubel Theater on Bellflower Blvd.
Once in a while, we would go at night. I still recall the
night my friend Bobby's parents dropped us off to see "The Bride
of Frankenstein". My parents wouldn't allow us to see
"Frankenstein", even though it had been at the movies since
1931, so I was really worried about watching this film. It
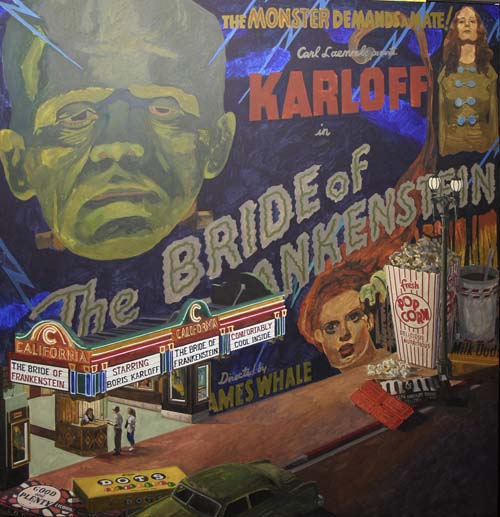
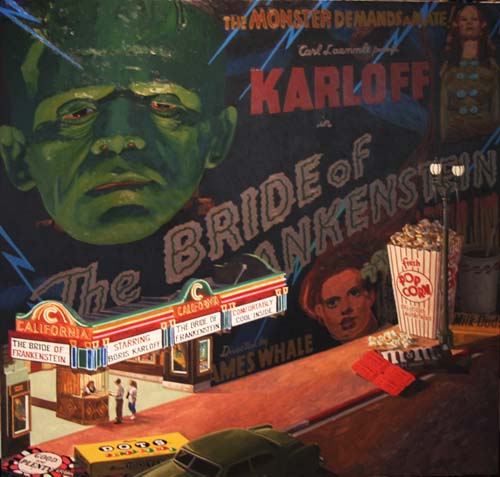
was just as scary as I thought it would be, so I will use the
movie poster from that movie as my background in the painting.
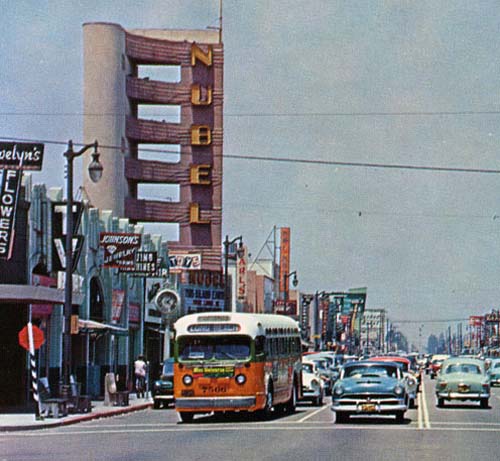
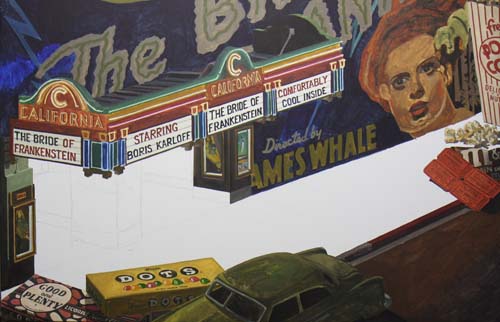
Here's a late 1940's photo of the Nubel, downtown Bellflower.

Movie posters were very cool in the 1930's, and this horizontal
one is perfect for my painting.
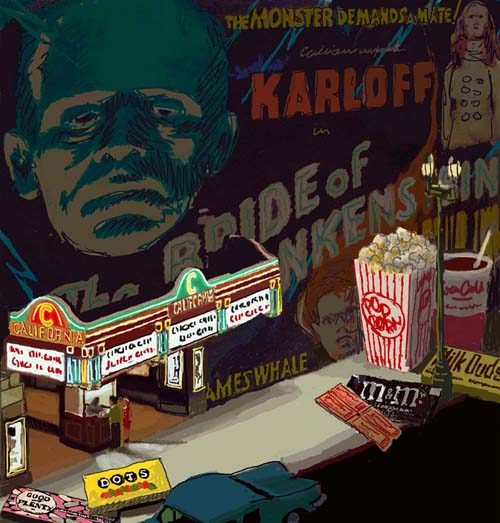
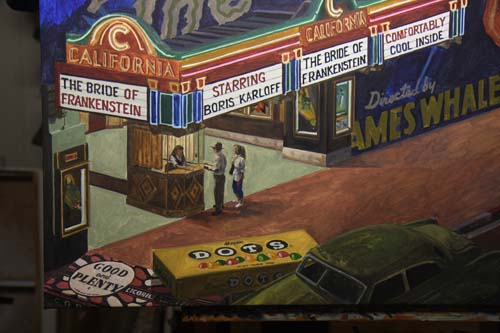
Here's my sketch for the painting, "MOVIE NIGHT".
With the movie poster plastered on the 'wall', the theater
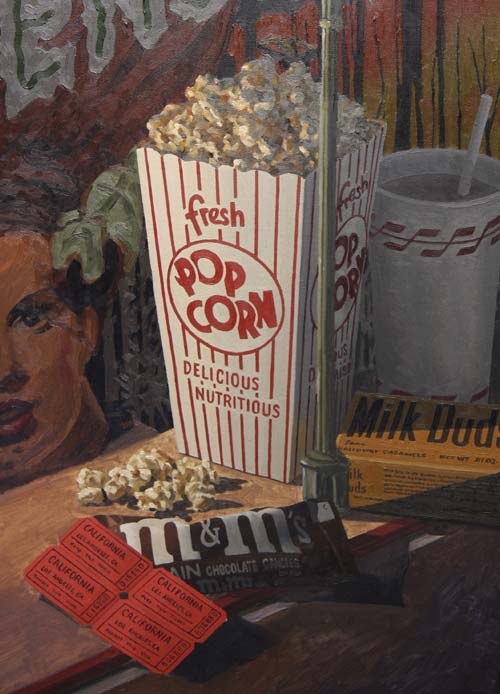
marquee juts out from it onto the street. The sidewalk contains
all the movie treats with popcorn, soda, Milk Duds, M&M's, Dots
and Good and Plenty's. There are two people purchasing tickets
at the ticket window and their two 'double' tickets are
positioned on top of the M&M's bag.
Click Here
for a larger image.
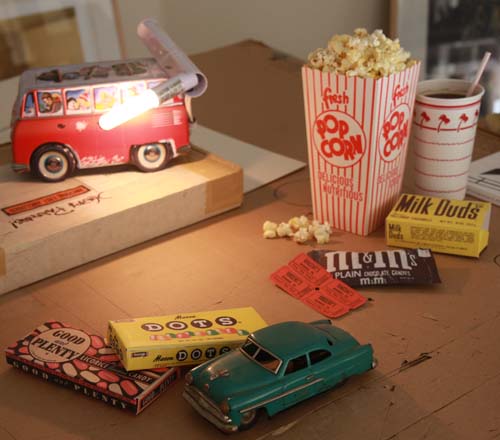
This setup will help me picture the lighting on all the objects.
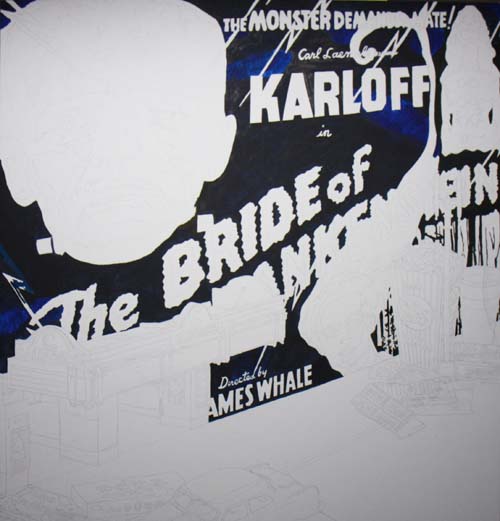
I am working on a 46"x 44" canvas and have begun the painting by
working on the poster wall.
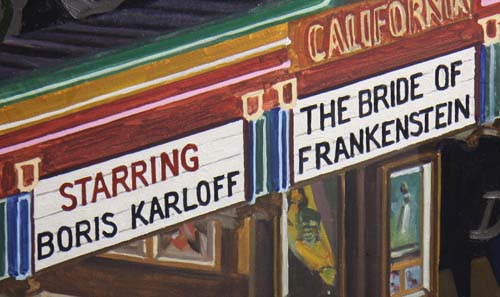
Boris Karloff was the original 'monster' in these films and got
top billing.
I've blocked in the basic colors on 'the monster'.
The back wall/poster is blocked in with preliminary washes of
thinned down oil. After I paint the foreground objects and
figures that have light on them, I'll adjust the values of this
wall so that it works as a solid backdrop.
While I am trying to locate three people to pose in this
painting, I'll move away from the 'people area' and on to the
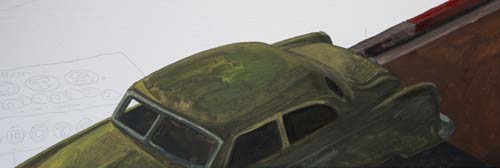
street. I've painted the car with a mixture of thalo
green, burnt sienna, yellow and ultramarine blue.
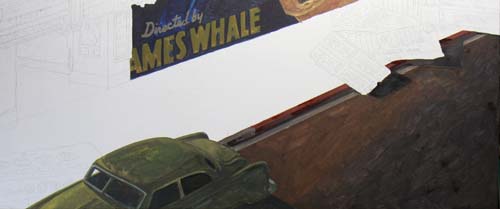
The street is washed in with burnt umber, ultramarine blue and a
little cadmium red as it gets closer to the sidewalk.

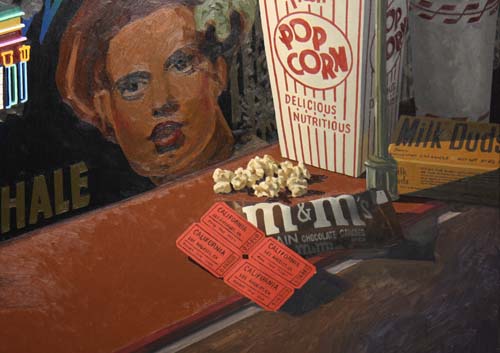
Here is a photo of the popcorn box and soft drink cup.
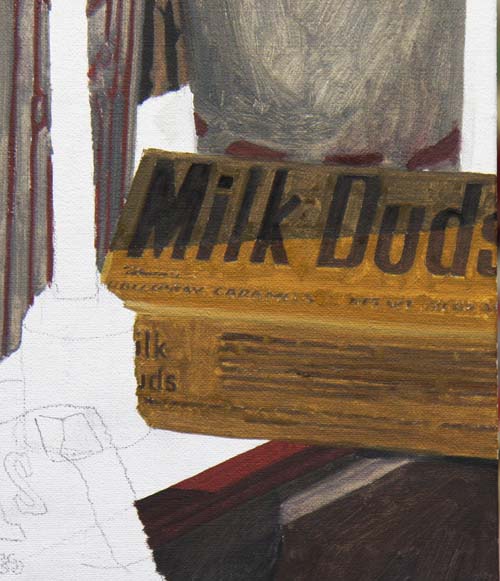
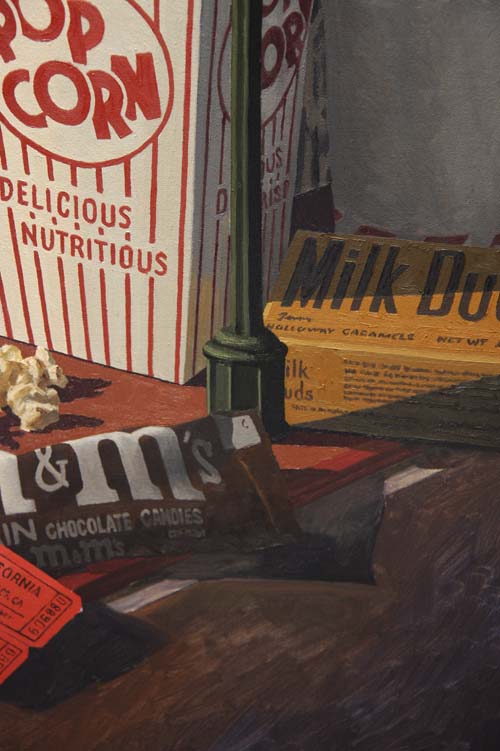
I'll paint one object at a time. The box of Milk Duds is
out of the way.
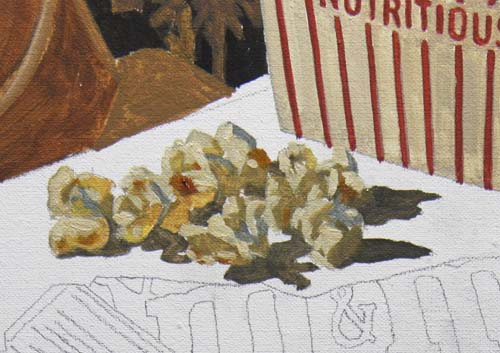
The spilled pieces of popcorn are painted on the sidewalk.
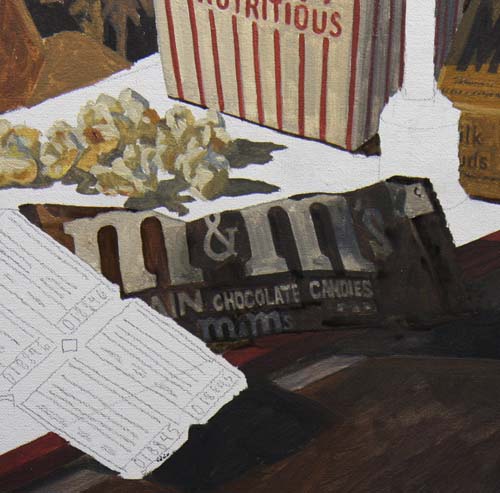
Everyone recognizes the M&M's bag. This iconic image is painted
in with Burnt Umber and French Ultramarine washes.
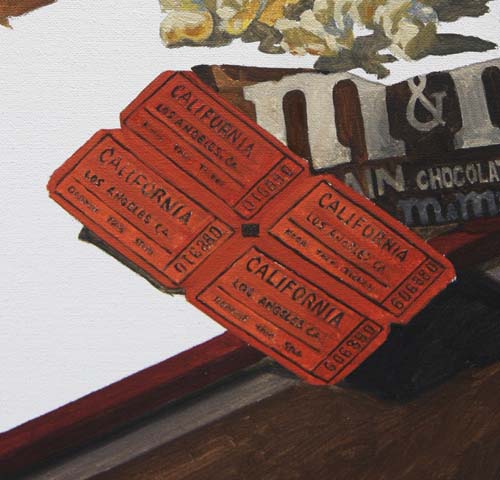
The tickets, double because the holder keeps the 'ticket' and
deposits the 'stub'. You can see that the numbering is
consecutive, if you look real close.
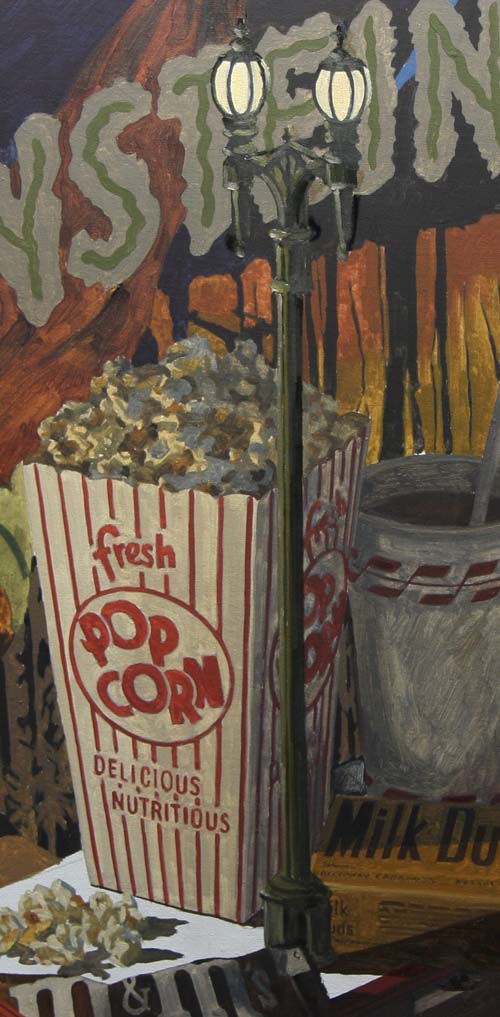
The street light will look like it is really shining when I
adjust (darken) the background in the second layer.
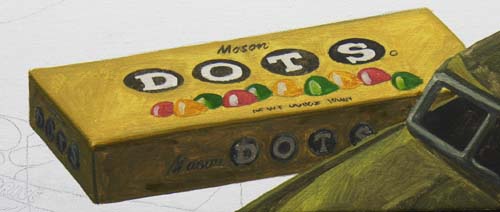
The Dots box adds another color to the painting, giving it more
interest.
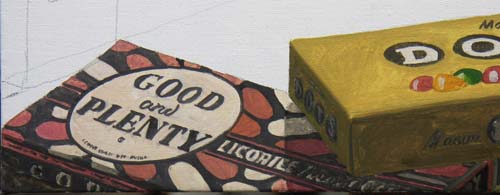
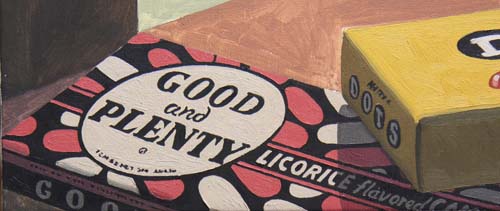
Underneath the Dots are the Good and Plenty. Talk about an
iconic design.
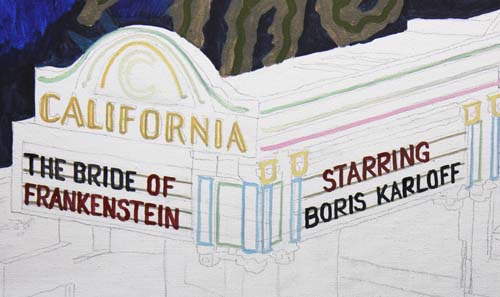
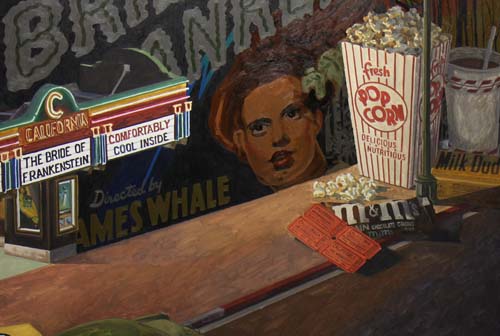
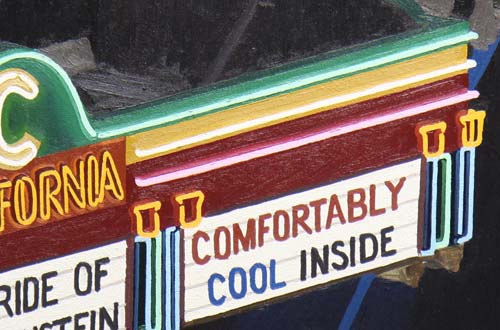
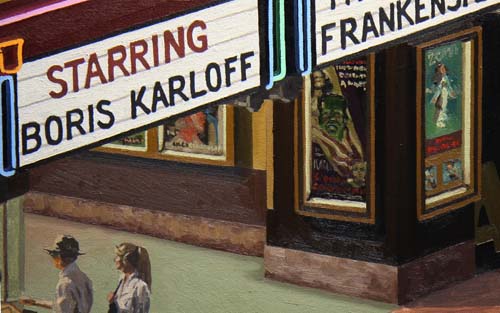
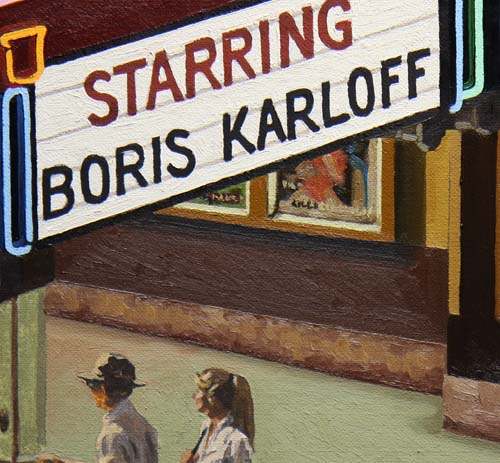
I have moved to the neon marquee, painting the neon tubes with a
light hue. I've also roughed in the plastic lettering on
the marquee itself.
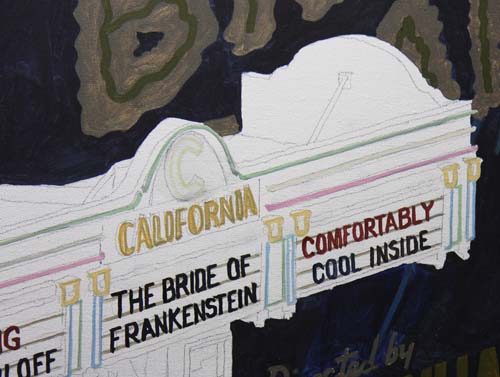
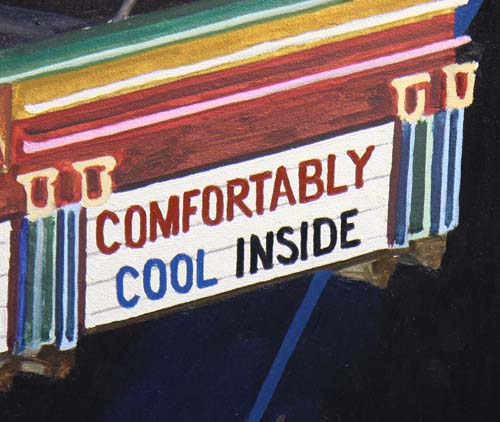
We have to assume that it is summer for the 'comfortably cool
inside' invitation.
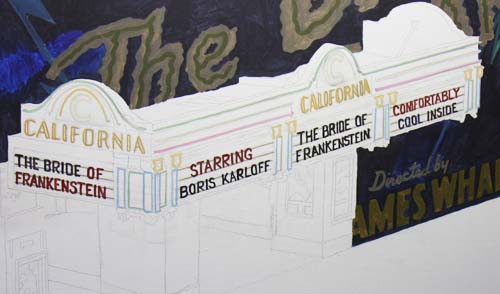
A look at the entire marquee so far.
The supporting structure of the sign is also blocked in.
I've further developed the marquee and the lit poster displays.
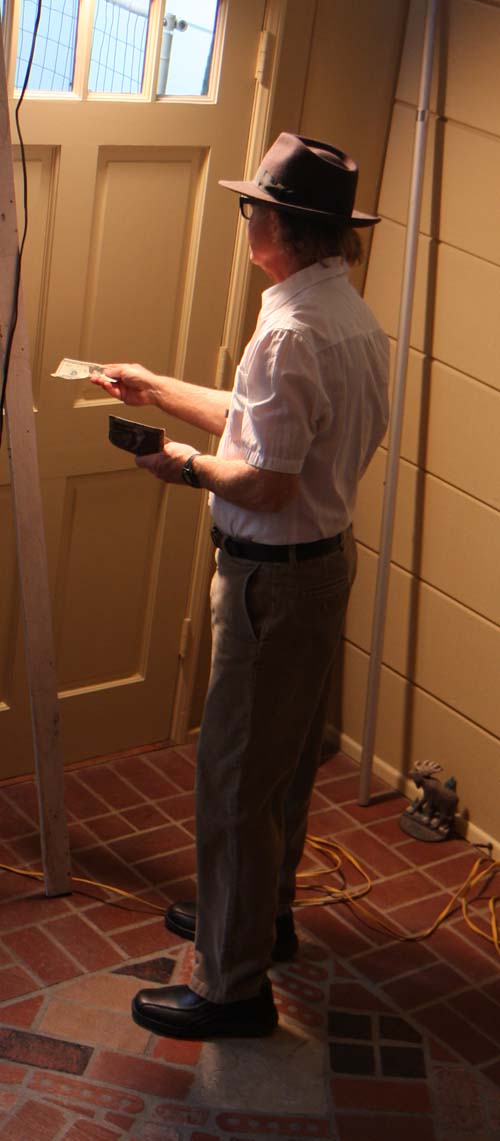
Carol and I decided to pose together for this painting.
I'll be the male paying customer at the ticket window.
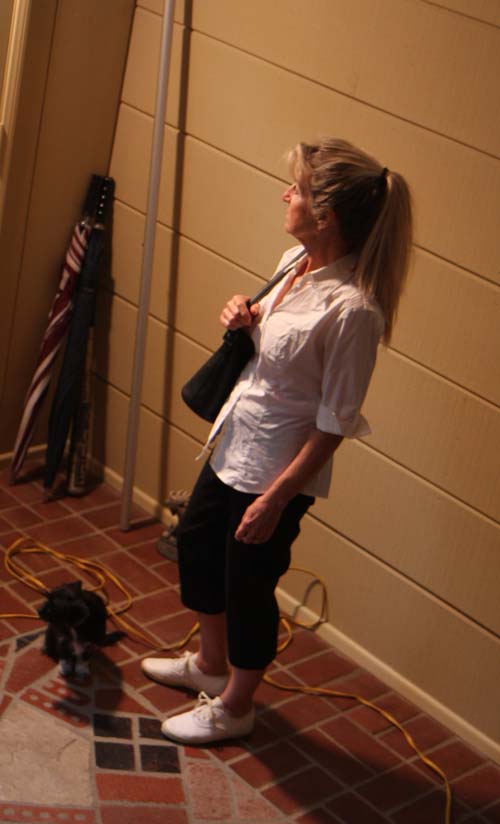
My lovely date...
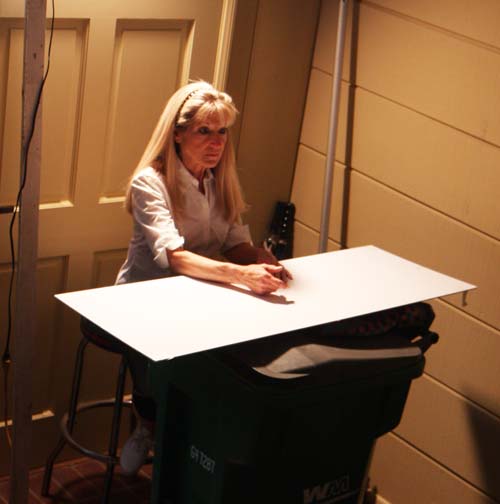
...and the lovely ticket lady.
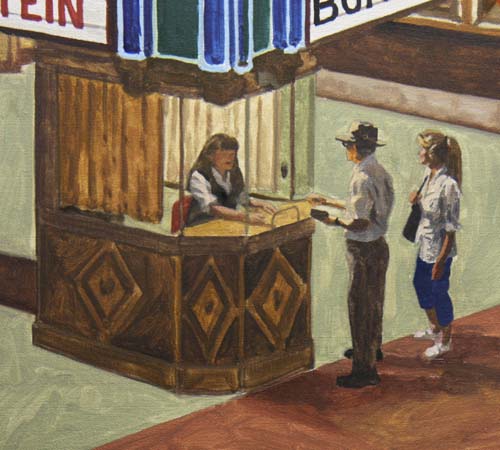
This photo shows the ticket booth and the two customers.
A detail of the lower area of the painting.
An overall view of the entire canvas with all areas of the
painting after the first pass of paint. The background
will be next. I'll adjust the values, mostly by darkening
the poster.
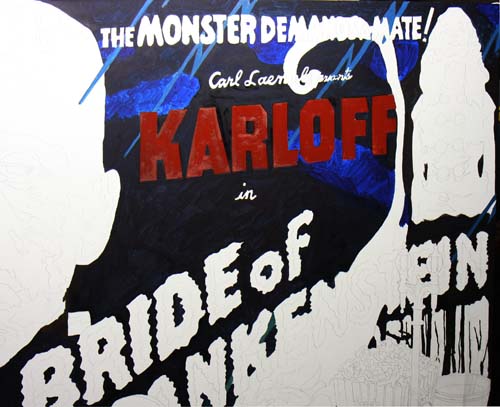
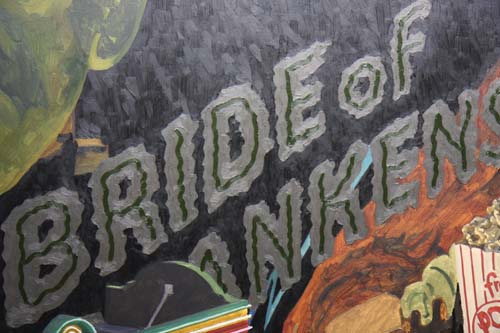
I've darkened the area around the poster figures and lettering
with straight out of the tube thickness pigments. I don't
ever use the color out of the tube, but mixtures of various
tubes. The dark areas consist of ultramarine blue, ivory
black and burnt sienna. This added contrast clarifies just
how light the other areas of the poster are. Look at the
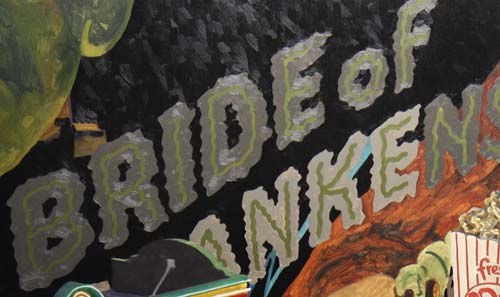
letters 'ANKE' in FRANKENSTEIN. I've already darkened 'BRIDE
of', so you can see just how much I've increased the value.
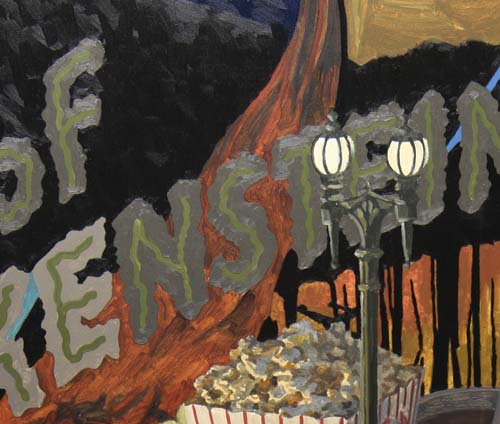
As the background darkens, notice how the lights on the street
light start to shine.
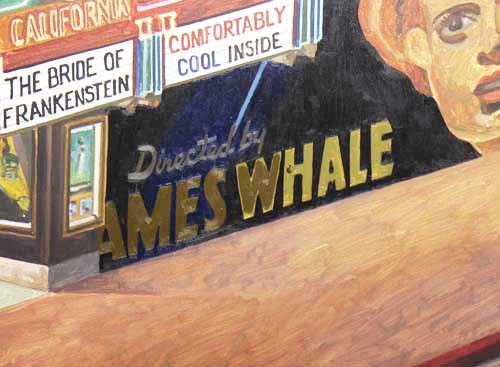
You can get a better idea from this section of the poster where
I am darkening up the director's name.
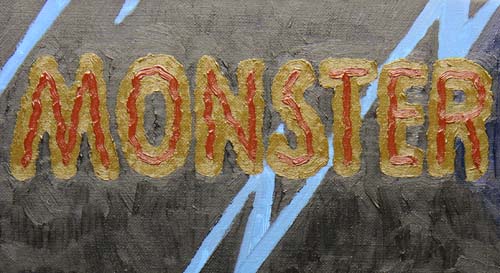
The red detail in the MONSTER is added as well as the green
in...
...The BRIDE of FRANKENSTEIN. Notice the dark background
has dried into a dull lighter value. That is the reason I
always coat my painting with a varnish, to bring back the deep
dark values that I originally painted on the canvas.

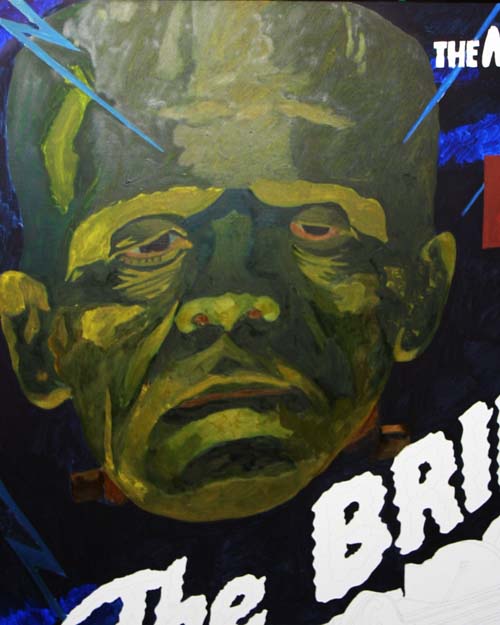
The figure in the upper right of the poster must be the bride
before Dr. Frankenstein zaps her. She is painted in very
deep hues.
The lower part of the poster background, which includes the
bride's portrait, has been substantially darkened. Now,
you can see the popcorn box begin to look light struck, as it
separates itself from the darker background.
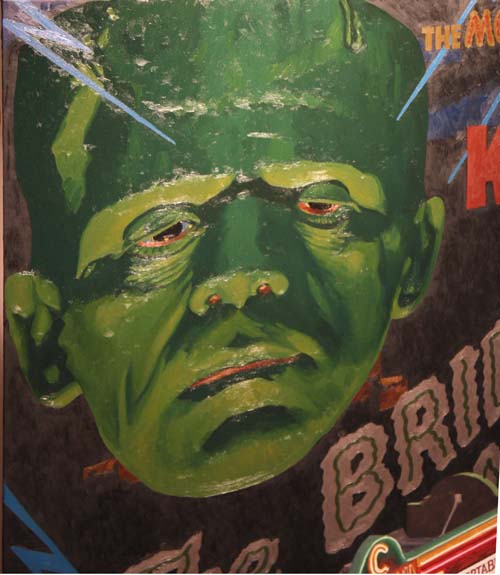
The Frankenstein monster is finished which completes the entire
background of the painting. On to the foreground.
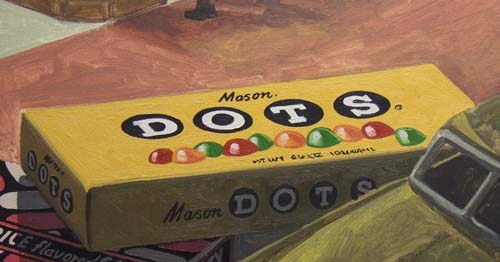
The Dots box is covered with thick paint. You can compare
it to the thin first layer of the sidewalk behind it.
The Good and Plenty is done also.
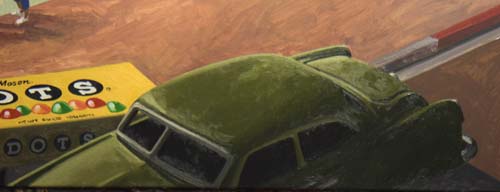
Here is a photo of the finished car. I used a little thalo
green, along with french ultramarine blue, burnt sienna and
cadmium yellow for the car color.

The tickets were a little of a pain with all the lettering.
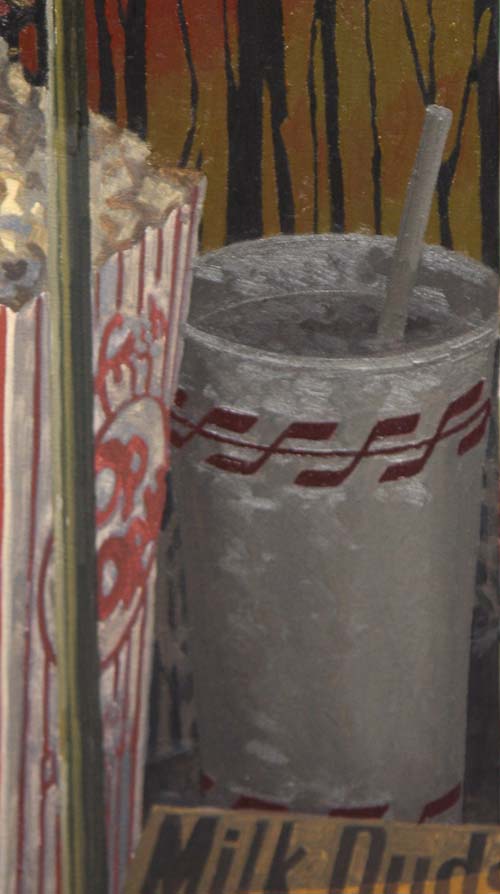
The final paint is completed on the drink cup.
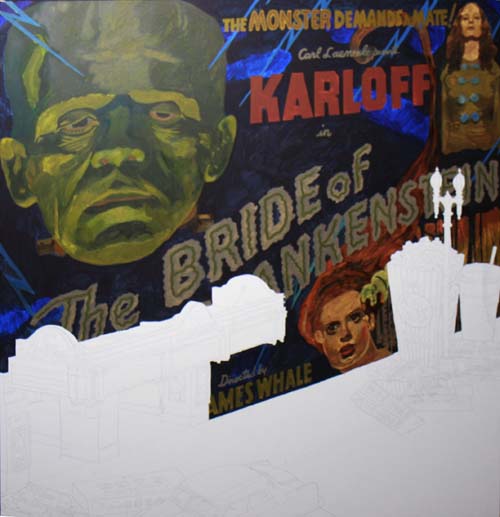
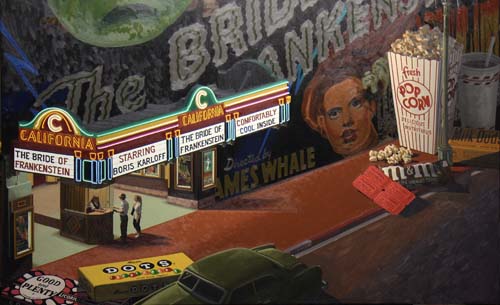
Here's an overall glimpse at the entire canvas. The
marquee, theater entrance, the people, the pop corn, milk duds,
the sidewalk and the street still need the final layer of paint.
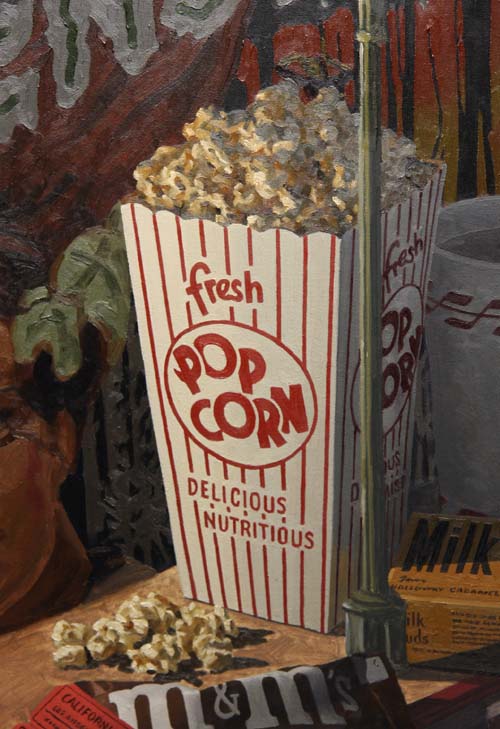
Rendering the popcorn box was time intensive
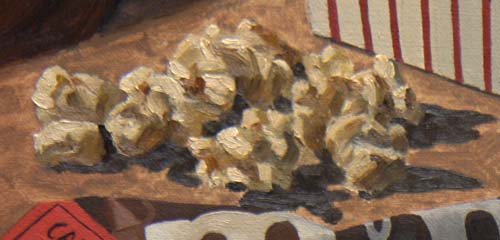
Here's a photo of the spilled popcorn.
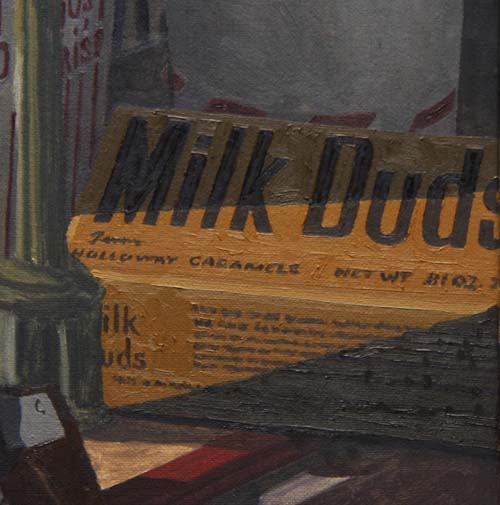
The Milk Dud box is lurking in the shadows. Look closely
and you can see the heaviness of the paint layer.
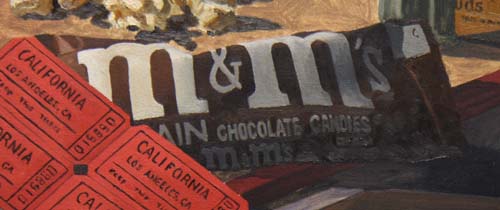
The M&M bag has some nice wrinkles in it. All finished
here!
The loose objects on this side of the painting are all
completed. The street light is the only thing left to be
finished.
I've put the final paint on the lettering on the four backlit
signs.
I'll move on to the neon around the signs next.
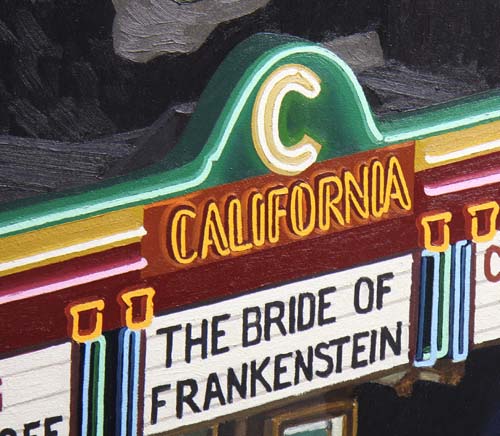
I've finished the theater marquee. Here are a few
close-ups...
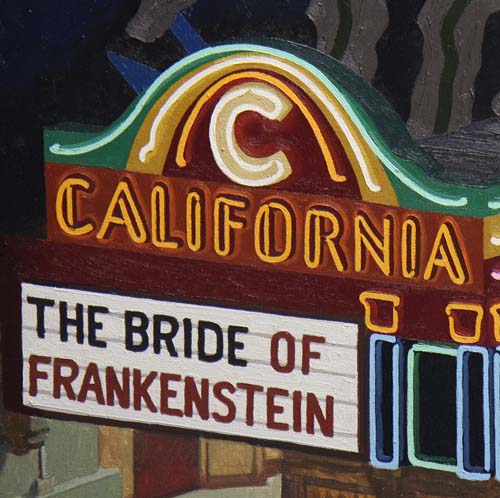
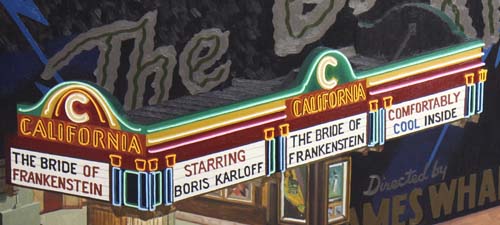
...and a photo of the entire marquee.
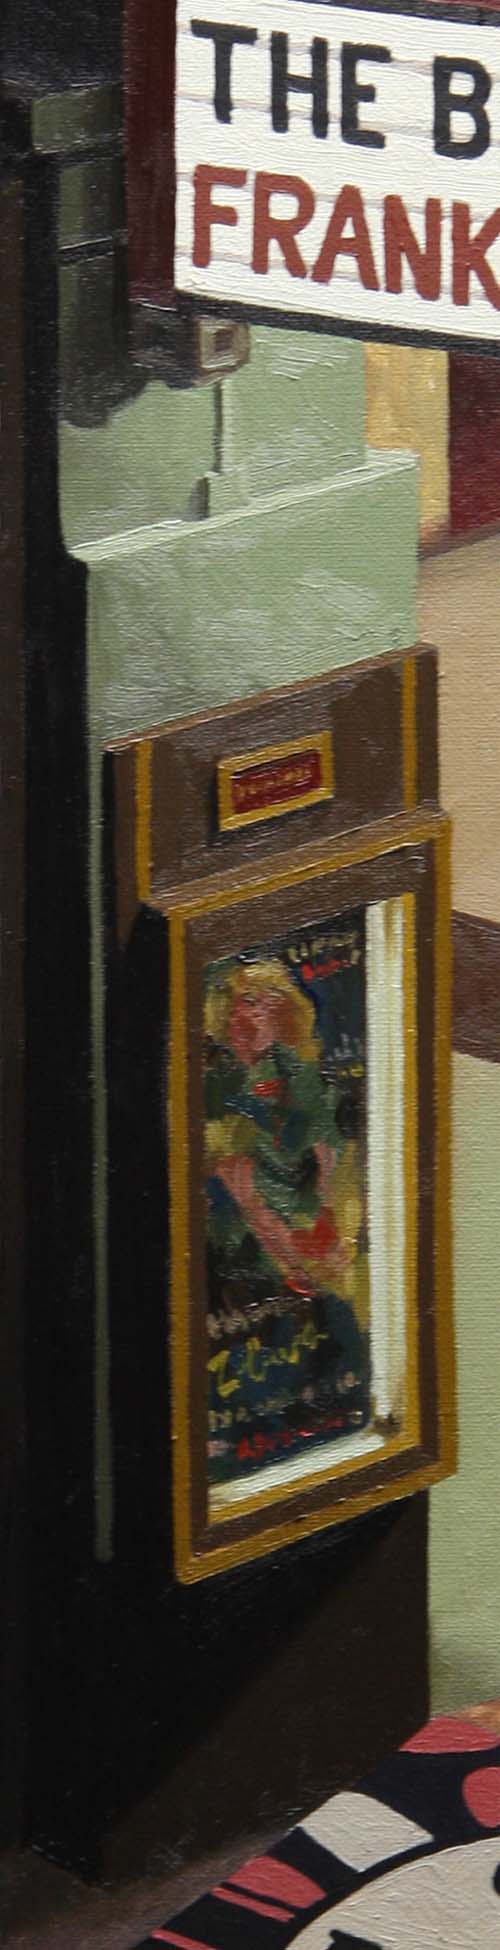
This is the lit movie poster display on the left side of the
theater entrance. You can see the thickness of the paint
application in this photo.
The right side of the theater entrance is painted with the final
layer of oil.
Here is a closer look at the area in the covered area.
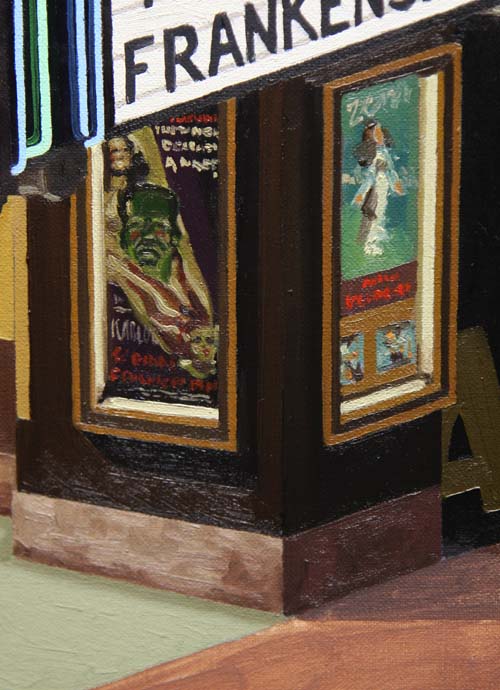
I've included another "Bride of Frankenstein" poster in this
poster display window.
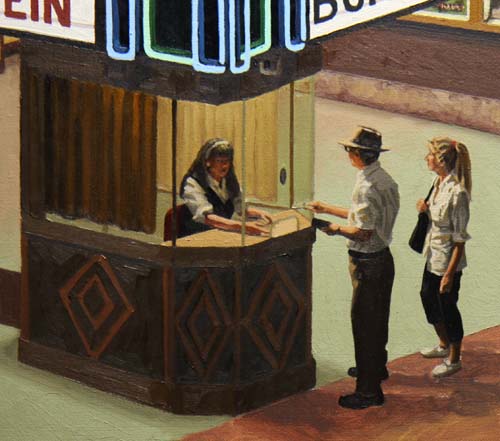
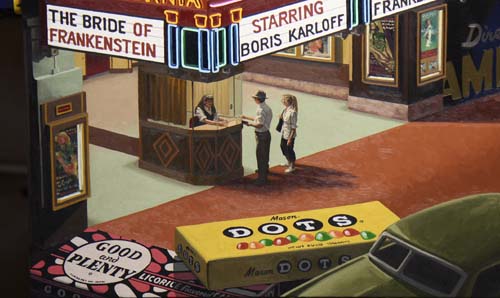
The ticket booth, ticket lady and the two movie goers are
completed. When I paint the sidewalk, I will darken the
area around the man and woman's feet. The final area of
the sidewalk and street will complete the painting.
I've addressed the sidewalk, defining cast shadows and softening
the transition of light from the brightly lit entrance to the
neon struck surfaces on the outer edges of the walkway.
Here's a closer look at the sidewalk around these objects.
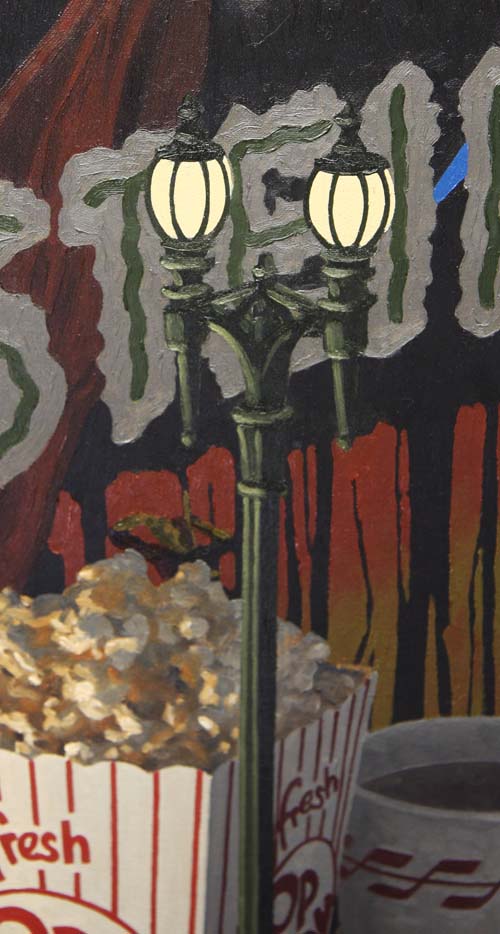
The streelight provides a design object that cuts into the dark
background of the movie poster.
This photo shows the detail of the base of the streetlight.
I've completed the last passage of paint. The curb, the
gutter and the street, along with the cast shadows from the car,
the tickets and the food is painted in with the final tube thick
oil.
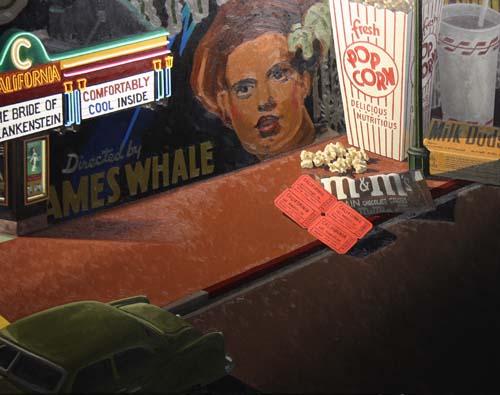
Here's a look at the completed bottom portion of the painting.
When this section has dried, I'll give it a light coat of
retouch varnish and then have it professionally photographed.
I'll post that final photo here when it is done.
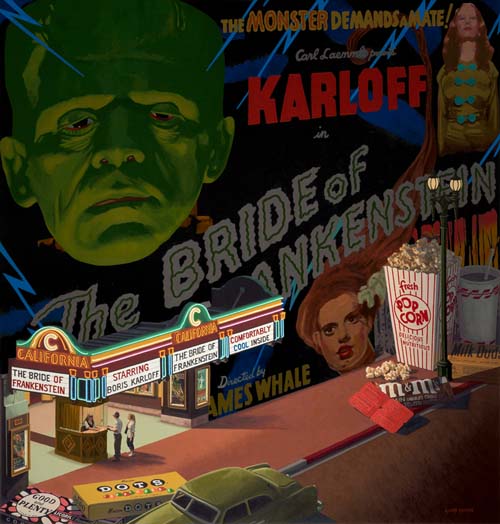
Here is the final painting.
|